Recent Posts

Thursday, May 9, 2013

Anna's Rapunzel Birthday Party

My little girl is turning 4! (Actually this happened quite some time ago.  I'm only getting around to posting about it now!) ...and this year she has requested a Rapunzel party.  I could not have been any more excited.  I loved this movie and it was the first movie we had ever taken Anna to see in the theatre.  Now, I am not a fan of doing a party store birthday party.  I would rather not go to the party store and buy every matching themed item they have, throw it all up in the house and call it good.  I like to create one of a kind party pieces.  I like a challenge.  So, here is what I came up with...
 
First, we worked on some decorations.
 
I made this door sign by cutting the Rapunzel sun out of foam core and then spraying it with gold glitter paint.  I attached a glittery purple 4 and a purple ribbon and I had the perfect welcome to our Rapunzel party.
 
 
This is the front walkway going up to our house.  I found some printable  Flynn Rider "wanted" posters online and printed off a bunch.  We put them on trees and anywhere else had space.

You can print your own Flynn Rider 'Wanted' posters here.  http://ayameclyne.deviantart.com/art/Flynn-Rider-Wanted-Poster-194154458

 
When each child entered the house, they received either a Rapunzel hair or a Viking helmet.  I made these Rapunzel hairs myself.  They were a lot more work than I thought they would be, but I think they were well worth it.
 
Here is a great tutorial on how to make the Rapunzel hair.
 
 In the second picture you can see a different version of the Rapunzel hair.  We had a few ladies under 2 years old and I didn't want the really long Rapunzel hair being any kind of choking hazard or getting stuck around their necks.  Therefore, I made baby Rapunzel hair and attached them to dollar store yellow headbands.  This worked out great!


The backyard was adorned with not only a bunch of Flynn Rider "Wanted" posters but this amazing Snuggly Duckling sign made by by my husband.  I told him I thought we 'needed' one and voila! A perfect replica of the Snuggly Duckling sign!


Here is our awesome magical glowing flower.  I bought a lily at the craft store and just painted it with gold craft paint.


We also bought a bunch of flowers in the clearance section at the crafts store and put them wherever we could find room.  Rapunzel loves flowers...and apparently Pascal does too!


The food was fun to do as well, but of course the cake was best of all!  Here are some photos of the Rapunzel tower cake.  It was almost 3.5 feet tall and was an exact replica of the one in the movie.  If you want to know more about how I made this cake and see more pics, check out my blog post Best Rapunzel Tower Cake Ever!
http://whimsicalbydesign.blogspot.com/2013/05/the-best-rapunzel-tower-cake.html

(...and can you see the cute banner I made at the top of the first cake pic.  It reads 'Best Day Ever'.)


Aside from the cake, we also had Rapunzel paint brushes, or rice krispy treats dipped in colored candy melts and then put on a stick.


Because there might not have been enough cake! ;)


I also made these fancy water bottle labels. They read 'Anna's Best Day Ever'.


We kept the activities simple.  We had a lot of little kids and families, so we opted to move away from traditional party games.  It worked out fine because it was a beautiful day and everyone wanted to spend most of their time hanging out and playing with their Rapunzel hair in the treehouse.


Here is Penelope hanging out in her baby Rapunzel hair.


We did plan one activity.  I bought a bunch of canvases and paint and each child was able to paint a canvas to take home with them.  I bought some pizza boxes at our local Cash n' Carry so that parents could take the painting home in their cars without having to worry about wet paint.


Here is my sweet girl blowing out the candles.

 
At the end of the party, each child received a Flynn Rider satchel (sewn by me) filled with all sorts of goodies. We included Rapunzel paints, a crown, a viking rubber duckie, princess crayons, a small chameleon, a ring pop, a necklace and a small mirror and comb.


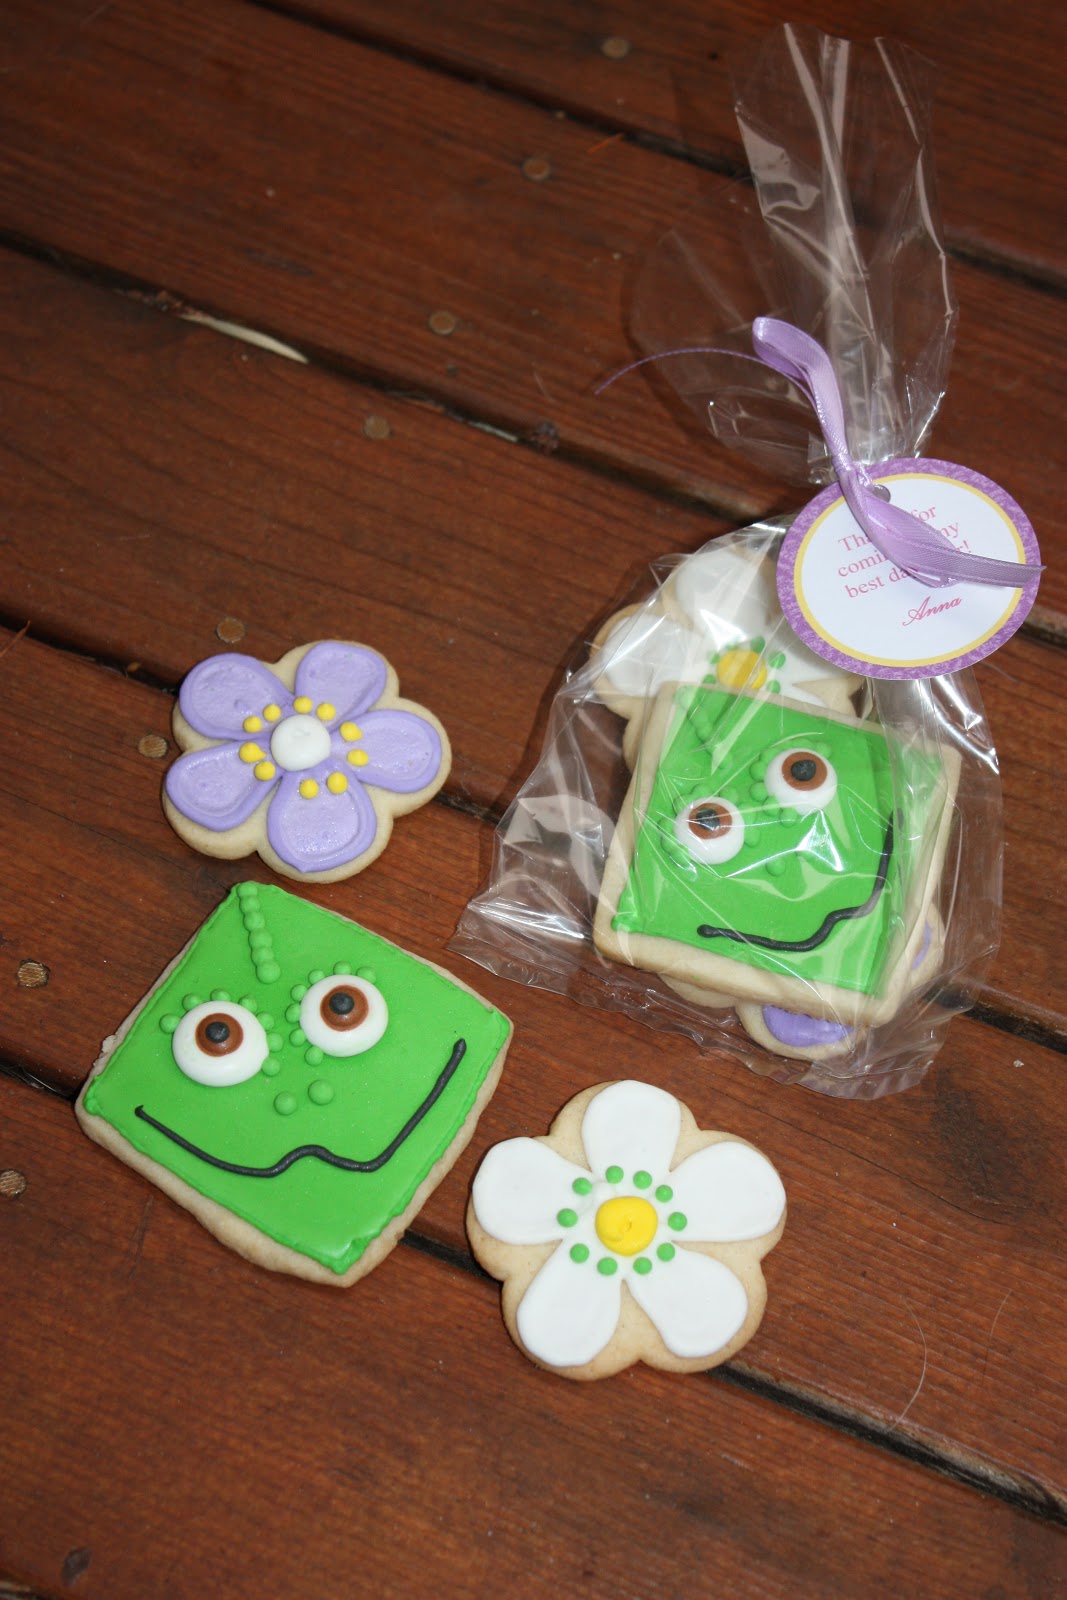
Everyone else got these cute Rapunzel inspired sugar cookies. I never do decorated cookies so I was pretty proud of how they turned out.


The day after the party, I took my little Rapunzel to the park and took some birthday pictures of her.  I had her wear her new Rapunzel hair and this cute Rapunzel inspired apron skirt I made her for the party.


Happy 4th Birthday to my sweet girl! Hope it was the Best. Day. Ever.


The Best Rapunzel Tower Cake

My AWESOME husband surprised me for Mother's day with a 3-day intensive class with Mike McCarey over at Mike's Amazing Cakes in Redmond, WA.  My Mother's Day present was a huge surprise and included the following...

In Mike McCarey's 3-day Custom Class, a maximum of 5 students spend 3 days receiving the ultimate in hands-on, personalized instruction from Mike and his talented staff.  Each student gets to create the project of their dreams from start to finish. Mike teaches the entire process from finding resource materials and creating patterns, to building your stand and then executing your cake to it's final finish. In addition, each student will watch and learn as Mike instructs the other student on their dream projects.  Possible project ideas were: cars, animals (standing or sitting), shoes, ball shapes, off-kilter tiers, boats, upside-down wedding cakes...

For more information on this class you can check out the calendar on his website at www.mikesamazingcakes.com.

So, what is my dream cake? I have no idea. I have a whole file on my computer filled with pictures of cake ideas I would like to make, but this is entirely different.  This cake has to be monumental, challenging...and large.  Mike is known for making over the top, enormously realistic, and to-scale replicas of....well, almost anything.  He asked me to send my top four ideas and with the help of the husband spent about 6 hours making my list.

I finally figured that if this cake was going to be as awesome as I imagined it could be, that I should probably make something that I could replicate for an actual event where people could see it. My little lady's 4th birthday was only 5 months away ;), so why not make her the best birthday cake ever.  The researching of different Rapunzel cakes lead to the realization that there were very few awesome Rapunzel tower cakes.  Most were some version of frosted upside down ice cream cones on cupcakes or stunted versions where it may have been possible for Rapunzel to just climb out the window and make a small jump to safe ground.

I sent Mike a picture of the tower as it appeared in the movie and when Mike called to talk about the specifics of the cake I couldn't have been more excited.  Mike explained that he wanted make a 3 1/2 foot
 tall exact replica of the tower.  The actual tower would be made of cake, while the top portion and Rapunzel's living space would be made entirely of chocolate.  The chocolate top of the tower would also be able to be removed from the bottom section of the tower so that it would be easy to transport and so that the top could be saved and admired for months after.

When I got to Mike's Amazing Cakes, I found my new work station and met the three other students I would be sending the next three days with.  The other students flew in from around the country (California, Las Vegas and Canada) to be there and each of the cakes we were going to be completing that weekend were entirely different.  We spent the morning reviewing the plans Mike had made and how to replicate them at home, talking about the internal structure, and getting to see all
of the work our classmates would be doing.

The it was time to get started. Here is what I found on my work table.

Picture of idea board

These are just a couple pictures of plans Mike gave me for the tower.  All the plans were copied to scale, as were the patterns for the tower's many details.

To learn more about how Mike makes his patterns and plans, check out his Craftsy class on Advanced Cake Sculpting here
www.craftsy.com/class/advanced-cake-sculpting-bobblehead-cakes


This is a picture of stands I used to create the Rapunzel tower.

The stand on the left is a 'working' stand.  This is the stand that I used to work on the top portion of the tower.  You can see the Styrofoam round attached to the stand in this photo.  This stand's lower height made a more manageable working height.

The stand on the right was the actual stand that the cake was attached and carved on.  When the tall tower of cake was carved, covered and finished, I removed the top of the tower from the 'working' stand and set it on the dowel attached to the actual cake stand.  Using the two stands also made transporting the cake easier.


Here are pictures of the tower building process. The tower was made from a buttermilk based white cake and surprisingly had no internal structure beyond the middle pole. We did not use any cardboard rounds in between layers and the tower was more solid than I would have thought possible.


The process for the top of the tower was little more complicated.  The structure started with
styrofoam rounds and then we covered them completely in modeling chocolate.  All of the details on the top tower were done in modeling chocolate.  With a little airbrushing and some buttercream piped ivy the cake was complete.  I couldn't have been more excited about the finished project.


Best. Rapunzel. Cake. Ever.


Here are some photos of the cake once I got it home.


I added these photos of Anna with her cake so that you can see how big the cake really was.  I don't think the pictures above truly do it justice.


 This one I added just because it is so sweet! Anna is looking for Rapunzel through the window.


While I was there, Mike generously offered for me to come back to the shop to recreate the bottom portion of the tower a few months later for Anna's actual birthday party. Of course I said "YES"!

Stay tuned for my next post detailing Anna's Rapunzel Party.
http://whimsicalbydesign.blogspot.com/2013/05/annas-rapunzel-birthday-party.html

Thursday, March 7, 2013

Koi Fish Cake


While I was at Cake Love 2012, I also took a cake carving class with Mike Elder from Black Sheep Custom Cakes.  It was a great experience and I learned a lot of new techniques that I will definitely be trying again soon.  Here is the finished project.  I think this koi cake is pretty fancy.

Gumpaste Peony

At Cake Love 2012, I took a flower class from Jacqueline Butler of Petalsweet Cakes.  For those of you that know me, I know...a flower class?  I love making cake and wish more often than not that I liked to, was patient enough or was good at making sugar flowers.  However, this class may have changed my mind.  My flower actually turned out pretty good.  I may have actually have the thought of making a whole army of these flowers, enough that I could cover a cake in them.  What do you think?

Gumpaste Red High Heel Shoe

This past October, I went to the Cake Love 2012 cake conference in Vancouver, BC with a bunch of my cake friends.  It was a great time and I got to take some fabulous classes by some awesome instructors. 
 
Here is my gumpaste red closed toe high heeled shoe I made in a class taught by Wayne Steinkopf   from Swank Cake Design.
 
I can't wait to make another and actually put it on a cake.  Right now, this one hangs out on the shelf is my craft room.  I think it might be lonely!
 

Ade's First Birthday - A Jungle Cake

I made this sweet first birthday cake for the sweetest little boy.  The jungle theme was really fun and gave me the opportunity to not only make some awesome gumpaste figures but extend the theme by adding animal print to the cake rounds.  Happy Birthday Ade!


The Pickle Cake

A friend of mine came to me and explained that her daughter was turning 9 and had requested a pickle birthday  party.  At this pickle party, they were going to eat all kinds of pickles, can their own pickles, and play a bunch of different pickle inspired games.  I love a good themed birthday party probably more than most people, so when she asked if I could come up with a pickle cake I was happy to help her out.
 
My friend gave me complete creative license with the design of this cake. The only requests were that it needed to feed 12 people and that they would like it to be made from chocolate cake.  In the planning process for this cake, I decided that I would try to make the pickle as realistic as possible and then quickly realized that this plan would either turn out great or turn out very, very badly. There was a definite possibility that the cake could turn out as awesome as I imagine it could be in my head or it could turn out to look like a big, green, unappealing blob of a cake. Oh geez!
 
I went to work baking, carving, covering and worrying...and then I decided that maybe the key to a fabulous pickle cake would be in it's color, or rather it's range of color, depth and realism.  So, I got out my rarely used airbrush.  I rarely used it because I am mostly afraid of it.  I have not used it very many time and know that once you airbrush a cake you can't got back, you can't remove it and it is extremely hard to remedy without starting over completely.  But, I went for it anyways and I am now in awe of the airbrush's awesome abilities.  Starting with a very light avocado green colored base I layered shade of green, yellow and warm brown to achieve almost exactly what I had imagined.  I love it! 
 
When I delivered this pickle, the birthday girl was not only surprised by how real it looked but also by it's size. You can't tell from the picture, but i grossly over-estimated the amount of cake I would need and this cake was huge.  I could easily fed 40 people.  
 
So, three cheers for a super huge pickle cake.  I'm sure it tasted better than it looked (because that is a lot of pickle).


***Another funny pickle cake story:
 
I saw my friend who ordered the pickle cake the week following the party and she had great things to say about the cake.  She then went on to tell me that since she didn't actually get to have a piece of cake at the party (and since there was so much left over) she decided to have a piece after dinner that night,  When she took a bite of the cake, she was surprised to find that the chocolate cake not only have a slight pickle flavor but was a tad crunchy.  Needless to say, she did finish her piece but still wondered if I had intended for the flavor of the cake to include the cake's theme as well.  The next day, after a little super sleuthing, she came to find out that her 4 year old son had come by some of the sprigs of dill that were left over from the party's pickle canning activity and had decided to place the sprigs inside the holes the candles had made in the top of the leftover cake. So, there was at least one piece of cake that actually tasted like a pickle.  Too funny!